If you are looking for an easy project that can literally be tailored to any season and any decor, then here is a super easy to make wreath. We made this way back in the day in my Brownie Girl Scout troop when my mom was the leader. If Brownies can make it, anyone can. This literally took an hour and requires no sewing and no gluing.
Here is what I did.
My colors were inspired by fabric I had purchased (quite a while ago for a different project) in a color coordinated bundle from my favorite quilting store, Patched Works, Inc in Elm Grove, WI. (The customer service there is amazing). I’ve been meaning to make a summer wreath for a while now and grading/school related everything has always taken precedence. But because it is Memorial Day weekend and soon to be 4th of July, I went with more patriotic colors. I don’t like super bright “Americana colors” so I opted for a softer vintage/rustic colored pallet.
Then, get an old write hanger. I found there are two types of metal hangers: the one that is INCREDIBLY hard to bend and one that is not hard to bend. Test out your metal hangers until you find one you can easily bend either just with your bare hands or with the help of pliers. Having manly help is awesome, but not necessary. When I was in GS, we made heart shapes. (I’m pretty sure my dad and my other leader’s husband bent about 18 hangers for us for this project). I really like the heart shape because it’s “homey.” So I chose that shape, but a circle square or anything else works.
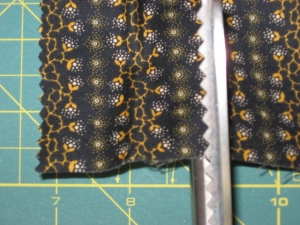
Next, I just “eyeballed” the fabric when I cut it. But I measured it. Cut the fabric into 2 x 6(ish) inch strips. It can be shorter or longer than 6 inches, but I found that around 6 inches was easier to manipulate. Anything smaller would have been cumbersome (at least for me). The bundles I bought were quarter yard fat squares. I cut them down the middle and then cut the strips. The first picture is already the half of the quarter after I cut it.
Here are the strips.
Here is a wider shot so you can see how I have the fabric positioned on my cutting mat.
Here is my color selection. The solid colored one on the left is worsted wool; the rest are cotton.
Next, this is where you can get artsy. I like consistent patterns so I chose blue, white, red repeating. But it does not matter. Your choice!
I started at the top right of the heart, but again it does not matter. You basically fold the fabric in half, making a loop, and then pulling each end through the hole. To achieve the desired result, lay the folded fabric over the wire. Spread the loop, stuff the edges through wrapping it under the wire. Make sure when the fabric is pulled through the loop, the fabric ends go up and out so the fabric is on the “right side.”
Keep tying until you’ve gone all the way around the hanger.
I had six pieces of fabric so I did two repeating patterns.
A craft project is not complete without an interruption by a cat!
Here is the finished product!!
And now it’s on our door ready to greet us and whoever visits. The colors are a little off in this picture because it was late afternoon and my camera was being goofy.


